


Peking Duck for Beginners
Thanksgiving is upon us and both Bob and I are not much for sentimentality these days, what with the United States verging on failed state status, so, here's our turkey dinner alternative...

Ireland is all about produce and farming. It’s about tender beef, lamb, and pork, fresh seafood, and bountiful, beautiful poultry.
All at remarkably reasonable prices compared to say our former homes in New York and Hong Kong. Admittedly, when you choose to live in two of the most expensive cities in the world, costly groceries and the dreaded “gourmet stores” and “artisanal” anything comes with the territory.
Not so in Ireland. While downtown Dublin and some of the more affluent towns have shops and markets with pretensions, the major supermarkets, local produce stores, butchers, and fishmongers overflow with reasonable prices and gourmet quality products.
I walked into the local Centra supermarket and saw they had fresh duck for sale, an almost 5-pound bird, locally raised, for €6. Yes, you read that correctly. And these were beautiful!
I’ve always hated Thanksgiving. Don’t miss it. The forced bonhomie. Turkey. Weird relatives. Shit television and phony patriotism. This year, with added death.
And turkeys are too much work with too little reward—the breast meat is notoriously dry, and the dark meat often cooks first before the rest of the bird, so in the end, you need gravy and cranberry sauce to save it.
So, with that in mind, I pulled together a pretty authentic Peking Duck recipe.
Full Disclosure: I Googled a lot of recipes and while many of the fast and easy recipes use honey to create the glaze, as well as using jarred Hoisin sauce, I wanted to go with as many natural ingredients as I could find to make it as homemade and natural as possible.
Ingredients
1 4- to 5-pound whole duck
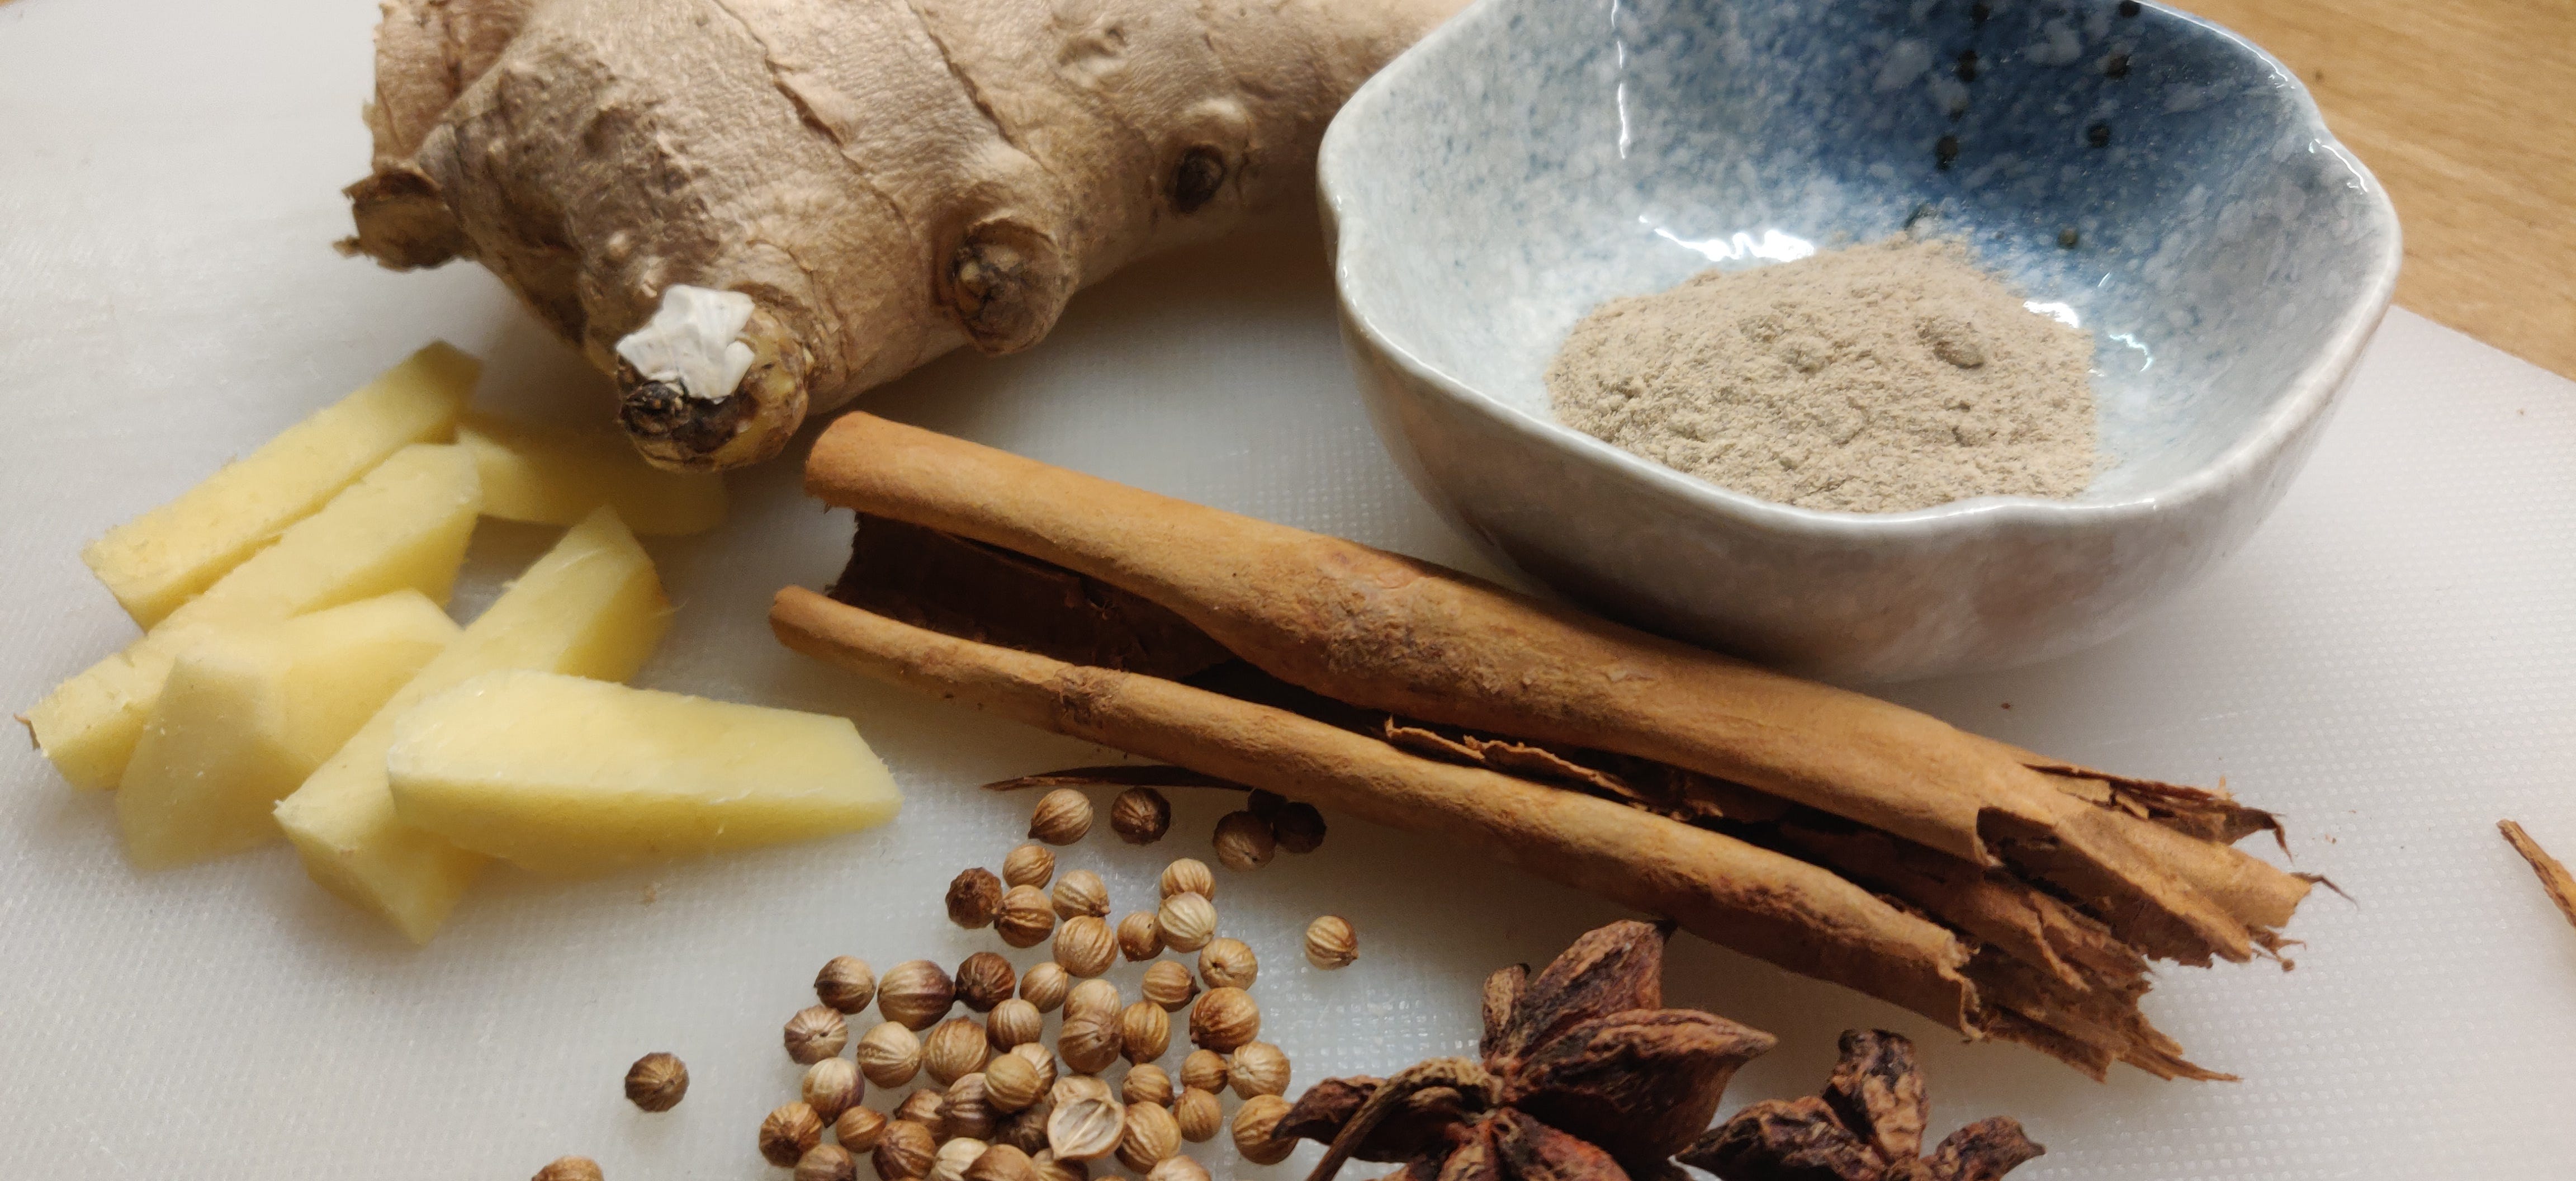
1 2- to 3-inch cinnamon stick
3 1-to 2-inch pieces of fresh ginger
1 tablespoon cilantro/coriander seeds
1 tablespoon Chinese Five Spice (if not available, 1 teaspoon of ground nutmeg)
1 teaspoon white pepper
2- to 3 cloves
1 teaspoon distilled white vinegar
2- to 3-tablespoons light soy sauce
2- to 3-tablespoons dark soy sauce
1 tablespoon honey
1 orange, quartered
2 to 3 green onions
½ cup plum sauce or Hoisin sauce depending on availability
1 teaspoon palm or brown sugar
One large scallion, finely chopped
One stick of celery, finely chopped
A handful of fresh cilantro/coriander, roughly chopped
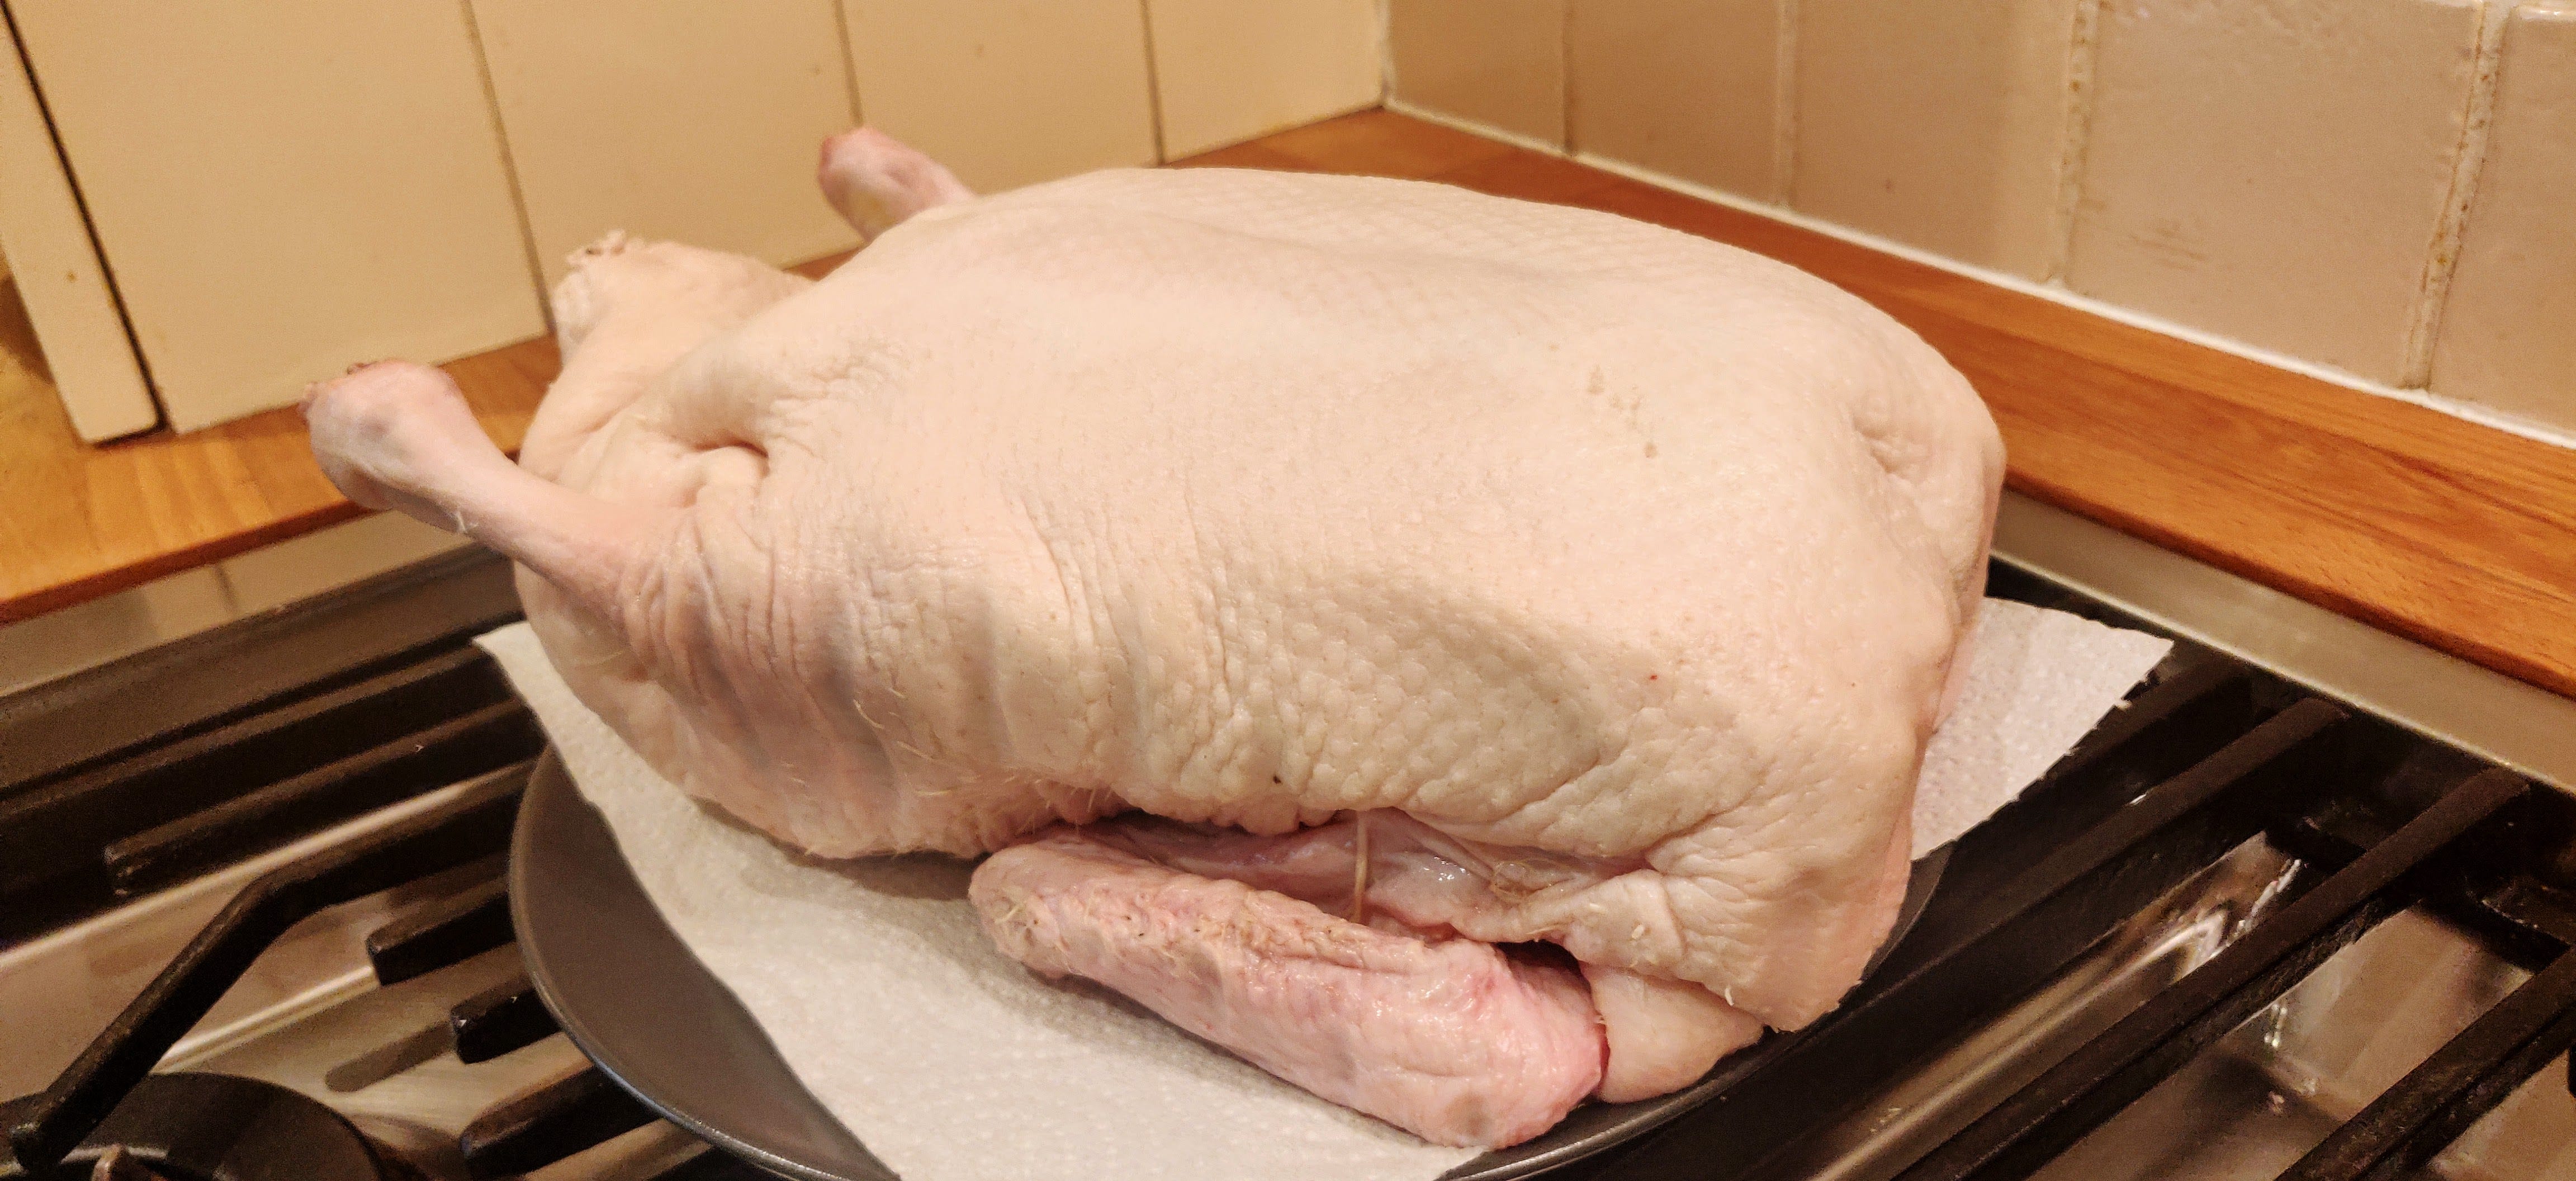
I left the duck out to come to room temperature and let it become more pliable. Ducks are fatty fowl with meat that has a sweet, almost beef-like quality.
Don’t let the size of the duck fool you, in all honesty, one duck barely feeds two adult grown men, so if you’re going for a party of four to six, I recommend TWO ducks and a lot of side dishes. LOL!
In a traditional setting, the Peking Duck is slowly roasted, hung indirectly over the fire in giant earthen-ware ovens with the rendered fat dripping away, keeping the meat juicy and the skin crisp.
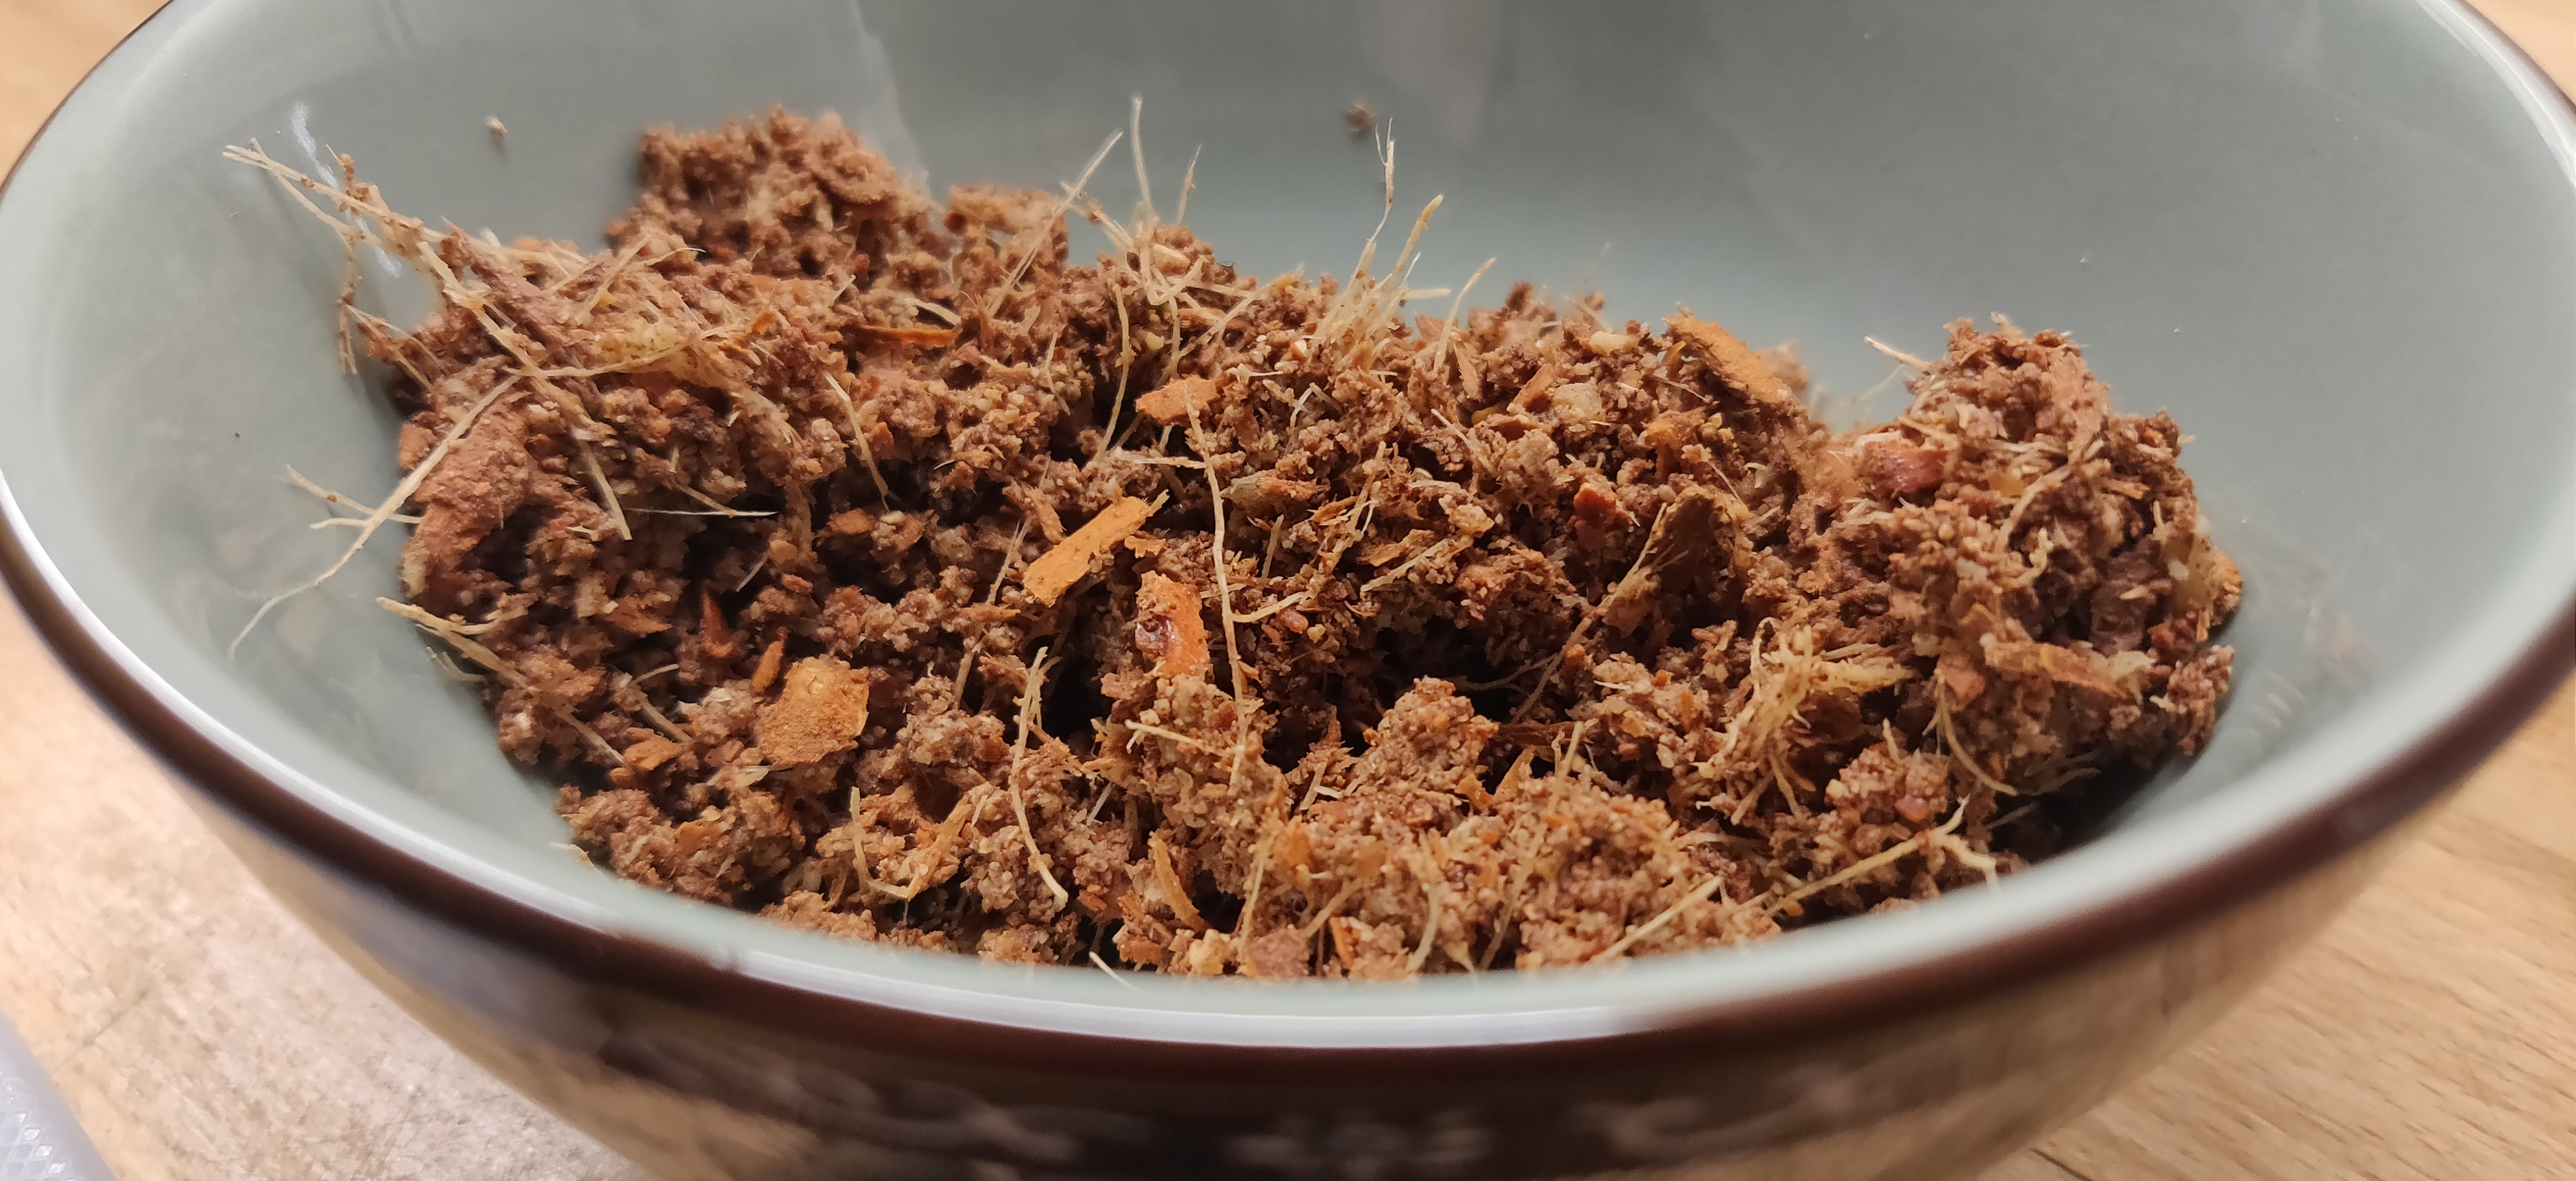
While the duck came to room temperature, I made the paste of what was to become the basting sauce.
Take half the cinnamon stick, chop two to three-inch slices of peeled ginger, a handful of the cilantro, the cilantro seeds, white pepper, salt and cloves, and the five-spice or nutmeg and throw that into a food processor.
Now, I read multiple recipes and watched several videos, and decided it was easier to cut to the chase.
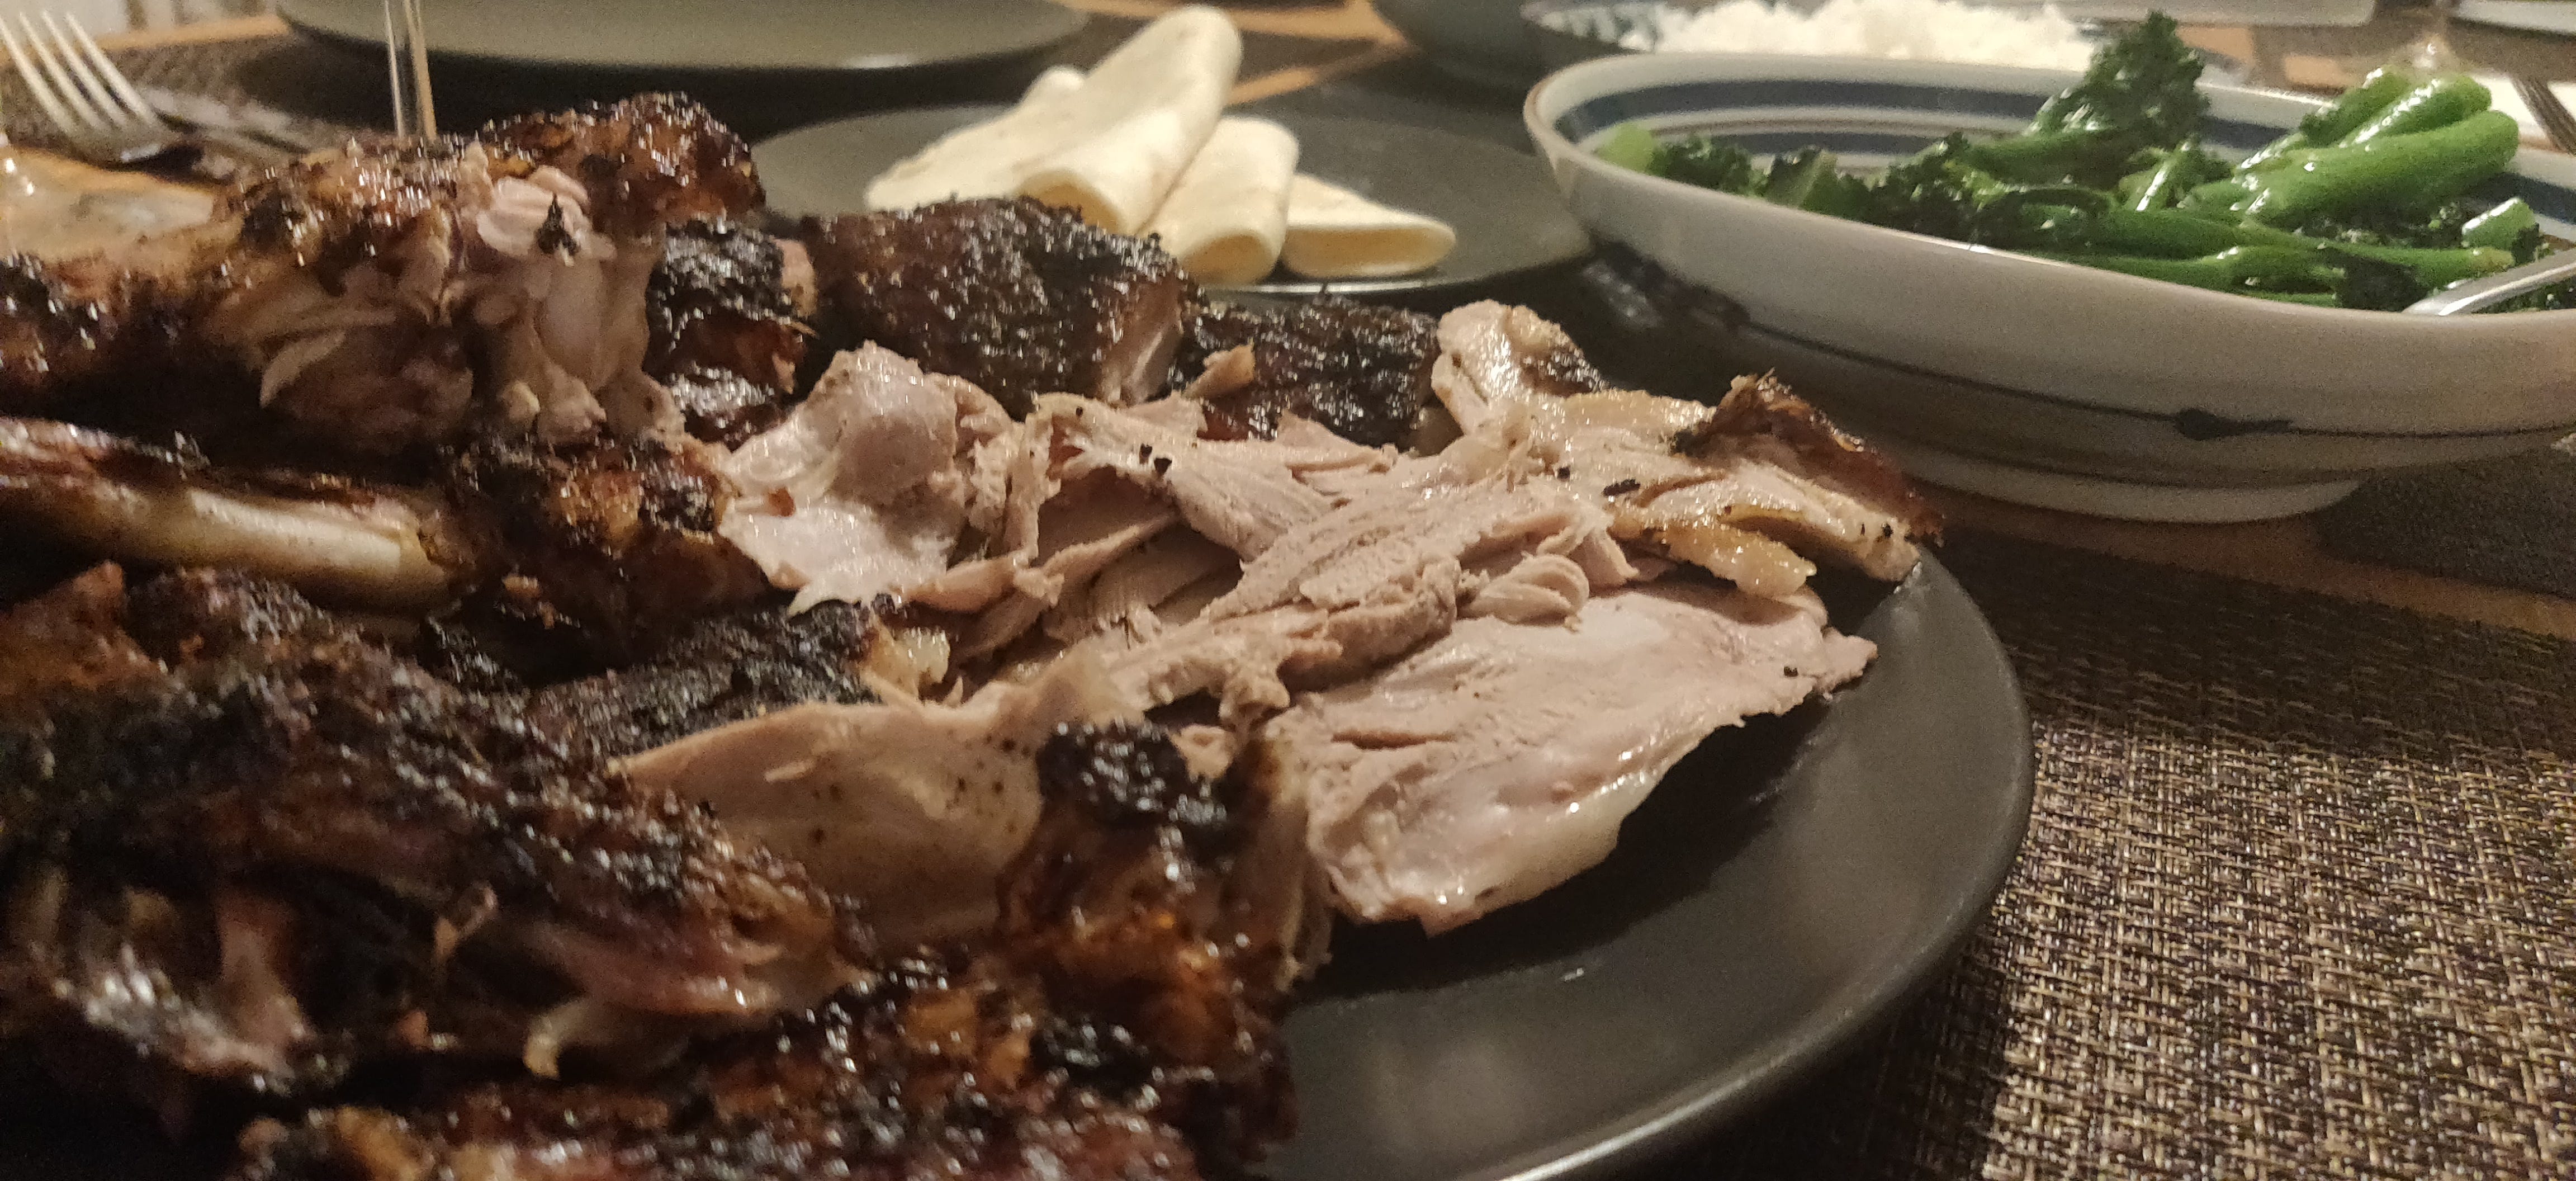
Peking Duck is defined by its aromatic sweetness, its crispy skin, and succulent flesh kept moist by the slow-roasting method which renders the fat through the meat on its way out of the bird.
So, instead of just seasoning the cavity of the duck with a portion of the paste, I opted to stuff the bird with two-quarters of orange, three to four-inch pieces of ginger, the other half of the cinnamon stick, crumbled, two to three star-anise and a tablespoon of cilantro seeds.
My concern was first and foremost keeping the duck meat moist. This was my first attempt at slow-roasting a duck of any kind and I wanted to assure maximum flavor and tenderness.

Next, I added two tablespoons of light soy sauce, one tablespoon of dark soy sauce, and a tablespoon of vegetable oil to the spice paste to create the sauce that I was going to baste the duck in prior to and during the roasting process.
I used a roasting tin with a tray that was about three inches deep. I lined it with tinfoil and added about an inch-and-half of water.
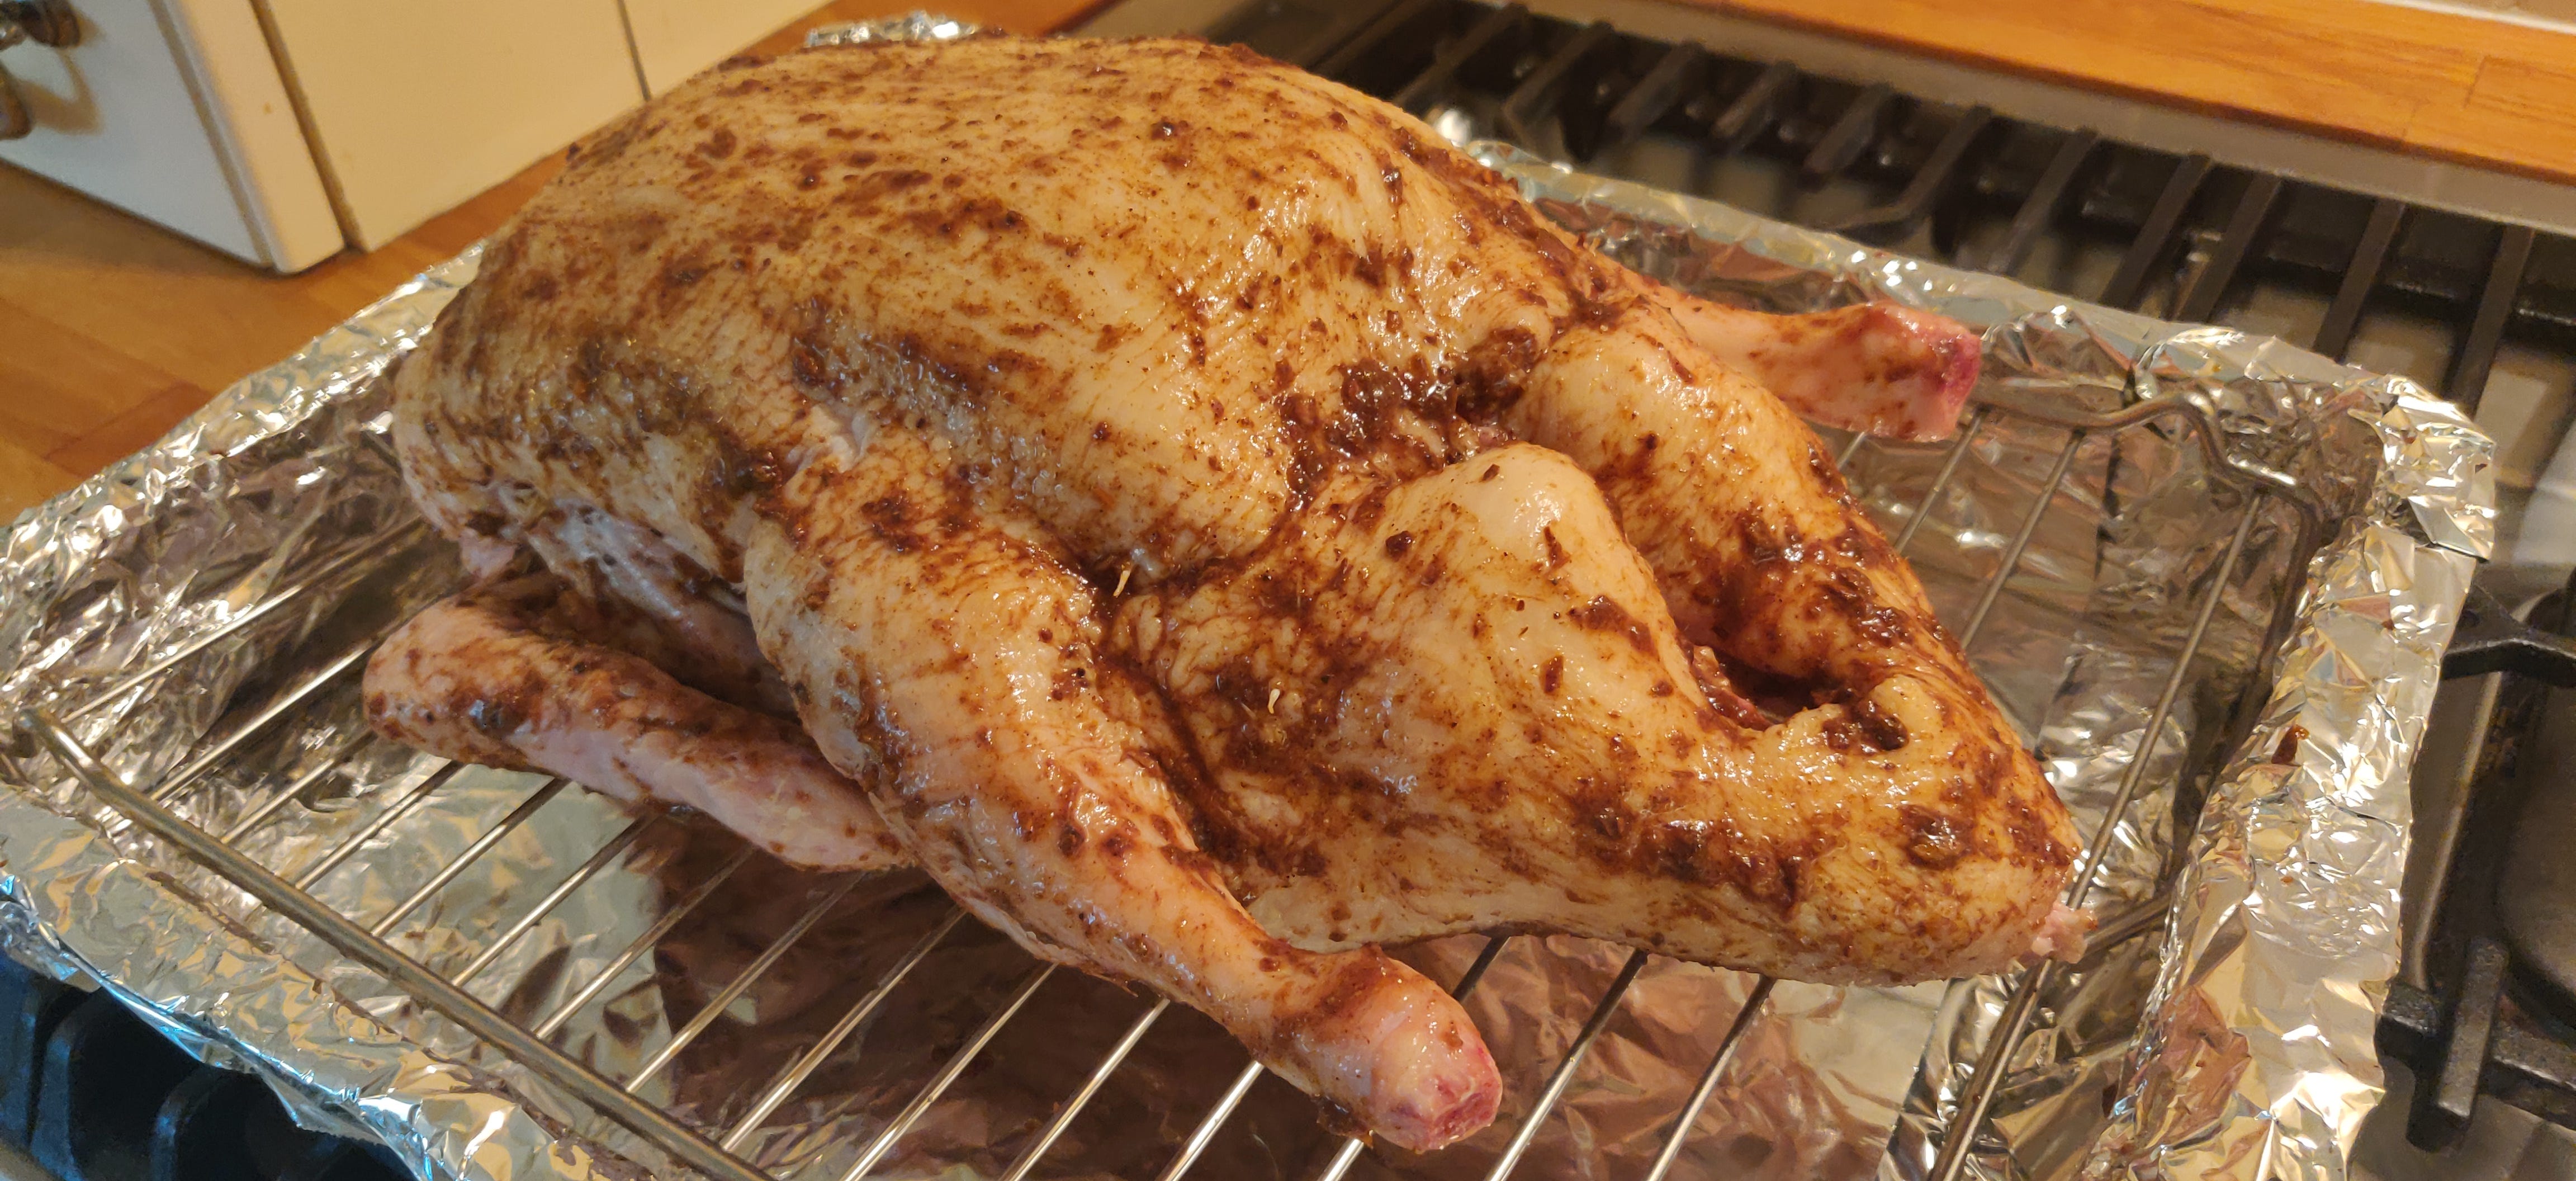
Next, with a sharp paring knife, I pierce the duck’s skin, about a dozen to 20 piercings on the top of the duck and the bottom. You want all the fat to render out during the cooking process.
As you begin to brush on the sauce and prepare it for cooking, pre-heat your oven to C200-F390 degrees for at least a half-hour.
Once the oven is at the desired temperature, place the duck in the center rack of the oven and lower the temperature to C120-F250.
This was about a five-pound duck, so every thirty minutes, I would take the duck out and turn it over on the roasting tray. I would also pierce the skin, as, during the cooking process, the skin tightens and sometimes the initial piercings reseal.

I rotated the duck every 30 minutes for 3 hours. Each time I flipped the bird, I would brush over the remainder of the glaze. As you start to run out of glaze, just add some soy sauce to the mix, to extend the sauce. It’s already packing a lot of flavors, so you’re not diluting it at this point, since most of the herbs and spices are on the duck.
Following the three hours, I turned them over to the grill for 15 minutes to get a nice crispiness to the skin. Watch it carefully as you don’t want it to burn.
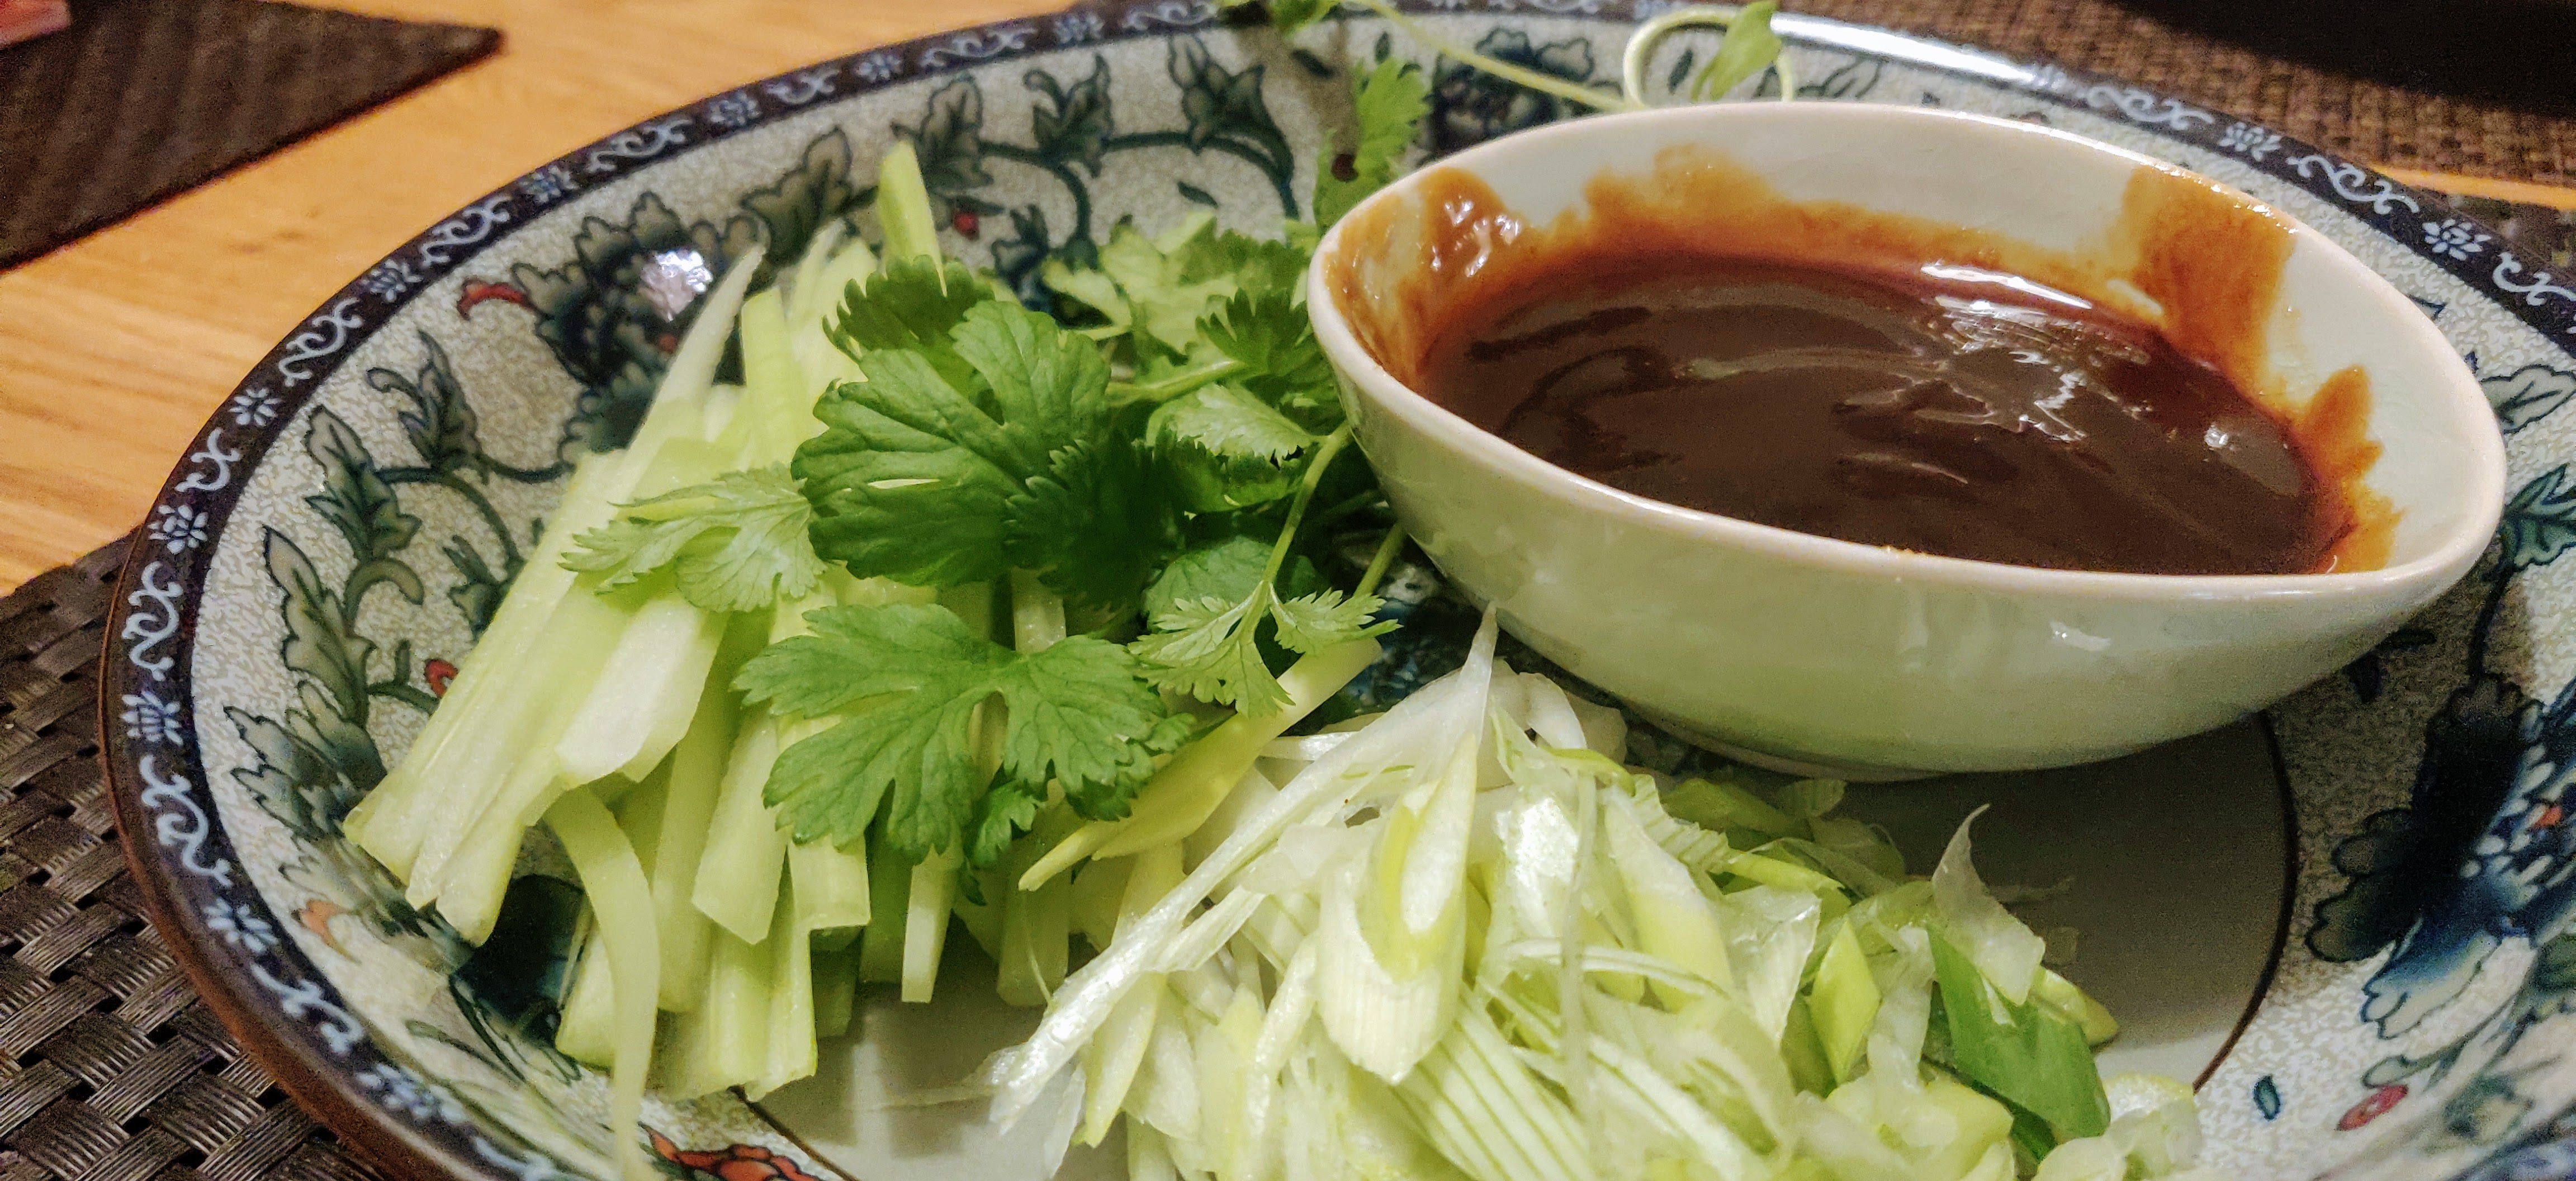
Next, I chopped up celery and scallions into a fine julienne, as well as fresh coriander/cilantro. You can use either plum or hoisin sauce with the small pancakes. Plum is preferred but might be hard to come by if you don’t have a dedicated Asian market.

I’ve tried to make this as authentic as possible, and while visually, it lacked the beautiful deep orange sheen of a Peking Duck from an authentic Chinese restaurant, the flavors were spot on and I can’t recommend this recipe enough for fans of the dish.
Enjoy!
EDITOR’S NOTE: A version of this recipe appeared on an earlier incarnation of this blog, from December 2020. Some slight alterations have been made as I’ve become a more experienced cook.